Hello, the last couple of day's have been spent in the shop working on the fairing. Unfortunately, my phone has a glitch right now where I cannot send my pictures to my email, so I do not have any new pictures. I am being sent a replacement phone right now though, so that shouldn't be a problem for much longer.
Here's what I have done:
Completely disassembled the fairing skeleton
Removed 7'' off the top of ALL of the fairing skeleton ribs since the trike was lowered and headroom was reconsidered.
Made all the spacers in the skeleton the correct length - 7 & 3/8 inches each.
Gave the rear end of the fairing a slight height taper - about 4 inches height difference over about 4 feet
Drilled a 1.4'' hole in ALL the spacer 2x4 pieces to save plug weight
Cut out the middle sections of ALL the ribs in the skeleton to save plug weight - this helped a TON for moving the skeleton around the shop. before doing this the plug was too heavy to move any more than a few feet.
Measured out the dimensions of all the front skeleton ribs
Created 1/6 front skeleton ribs
I'll be back in the shop tomorrow to finish up the front and also to cover the skeleton in fleece so that saturday I can wet out the fleece on the skeleton for the first real layer of the plug!
Thursday, March 24, 2011

Saturday, March 19, 2011
Velomobile Update
Hey again, sorry it's been so long since I last posted. I haven't been particularly good about taking pictures or videos lately as technology has been giving me problems. But I will say that we now have two rolling velomobile chassis and the shell is coming together, but I think I may keep our shell progress in secret so we can have a big unveil :)


my trike was lowered about 3''

my trike was lowered about 3''

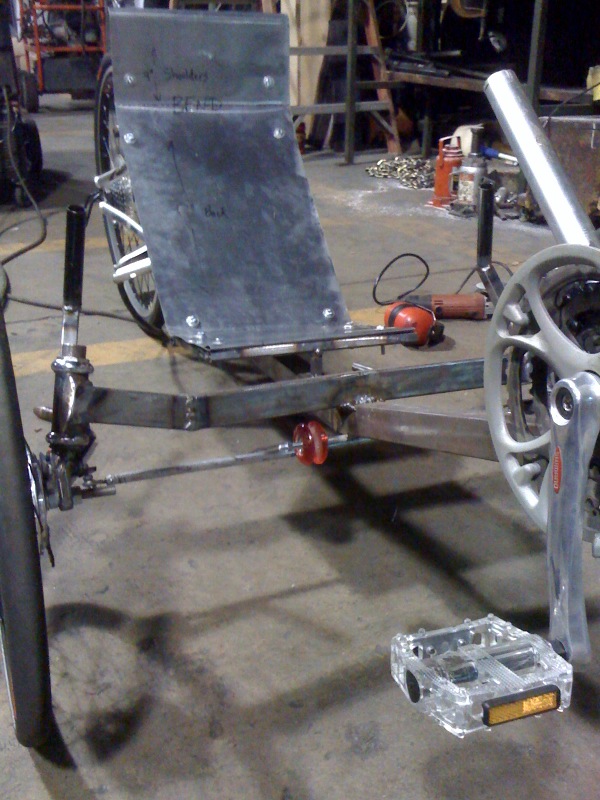
Dan's trike was made and the tie rod was installed after this pic

i finally figured out how to make my lever steering work :) this same system will be put on Dan's trike as well. the linear motion provided by lever steering helps to save space inside the velomobile
 |
| Dan's chassis in foreground, my chassis in background after this picture, Dan's seat was mounted, his front crank was mounted, chainring and pedals installed, and front wheels were tied together with a tie rod. |
Sunday, February 6, 2011
Trike 2 Fairing Build Pt. 3
Yesterday my friend Mike helped me start attaching the ribs of the skeleton for the plug, and today I finished up the rear half! Video coming soon.


Friday, January 28, 2011
Trike 2 Fairing Build Pt. 2


Thursday, January 27, 2011
Trike 2 Fairing Build Pt. 1
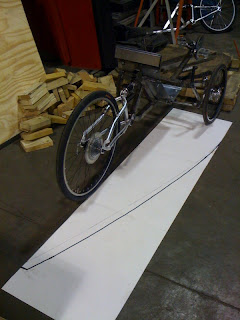
Hello everyone! I wasn't planning on releasing all of these pics as a post just yet, but here is the very beginnings of our fairing shape! We have started construction and our fairings are underway! As you can see plywood ribs are being constructed to form a skeleton, and fleece cloth is to be stretched over this skeleton, wet out, then reinforced with fiberglass to create our plug. from there we can lay up our female mold, then we can produce the fairings themselves while we're finishing building the trikes! We're right on schedule!




Saturday, January 8, 2011
Trike 2 Build Day 9: Revision & Refinement Pt. 1
Hello everyone, now that I've finally recovered (financially) from my car accident, Ive started back on the trike. Sorry for the long delay of progress! I found that my track width was too wide for my liking (34'') so i reduced it to 29.5'', and with the reduction came a small amount of negative camber, so track width on the ground is 30.5''. Next comes chain management, then hooking up shifters and starting the fairing!


Saturday, December 4, 2010
Trike 2 Day 8
Today marks the final day in the shop for the trike! Handlebars were welded on, idler was mounted, crank was welded on, and now all that's left to be done is routing the chain, routing the brake cables, painting the frame, and gluing on some foam to the seat!
Fairing design is already underway, and I will begin constructing a plug to make a mold from very soon!!


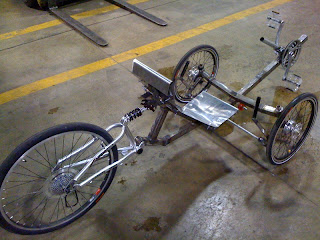

Fairing design is already underway, and I will begin constructing a plug to make a mold from very soon!!




Subscribe to:
Posts (Atom)